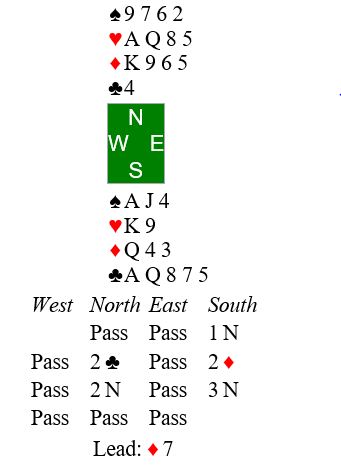
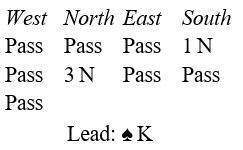
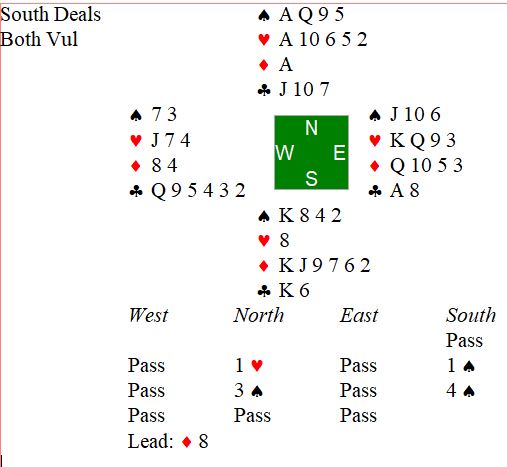
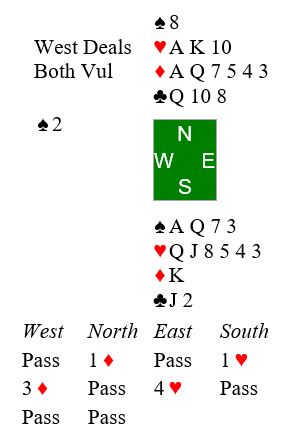
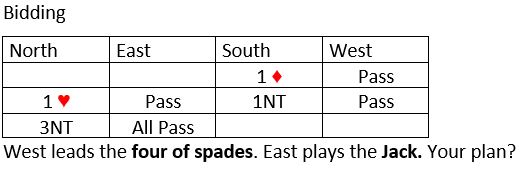
10 tricks are easy on this one. But you are in five hearts. Where are you going to find the 11th winner? Here is the hand, auction, and opening lead.


Your thoughts at trick one:
- What can I infer from the opening lead?
- What can I infer about opponents’ spade holdings from the bidding?
- If my inferences from opening lead and bidding are correct, then how many cards does East have in the red suits?
- Now that I can picture East’s hand, how am I going to hold my losers to two?
Give it a try and then scroll down for the solution.
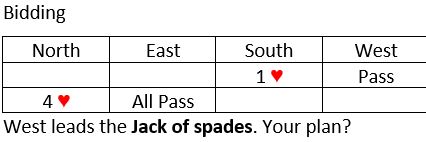
Your thoughts at trick one:
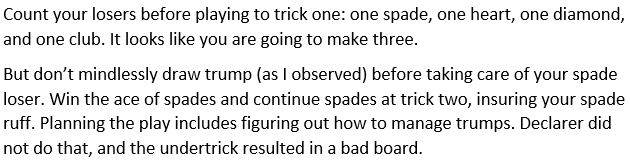
- What did you infer from the opening lead? I bet it’s a singleton!
- What can you infer from the bidding? Looks like West must have four spades for the preemptive jump raise. East must have 5 spades to the ace from opening bid.
- If your inferences from opening lead and bidding are correct, then how many cards does East have in the red suits? East has five spades and five clubs. Therefore, East holds three red cards.
Now that you can picture East’s hand, you know to go up with the ace of clubs immediately. Otherwise, East will win the trick and give West a club ruff. When a spade comes back through king in dummy you will be down two after first four tricks.
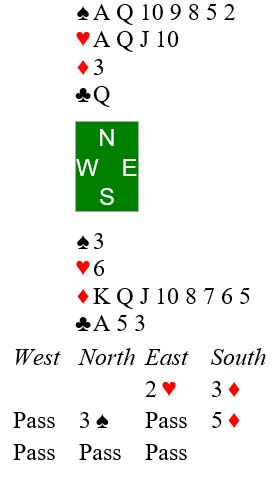
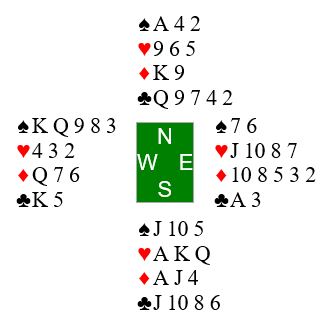
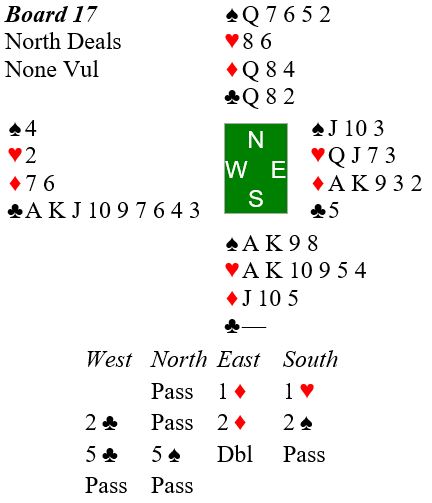
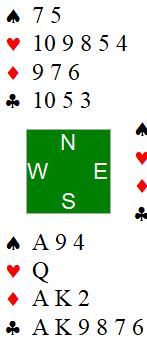
The idea is to end play East in one of the black suits. Run your seven hearts. By doing so, East must protect the black suits. So, East will be left with 5 black cards:

Now when you cash your ace of diamonds, pitching a low club from dummy, East must discard a club or the queen of spades.
- If it’s a low club, you will lead a club to the king and throw East in with a club. East will have to lead a spade from A,Q into your K3.
- If it’s the spade queen, you will lead a low spade and play low from dummy, throwing East in with the ace of spades. Now you will make 12 tricks, since East must lead into your K, J of clubs!