Tag Archives: Watch your entries

Fundamentals of Declarer Play

Posted on by 0 comment

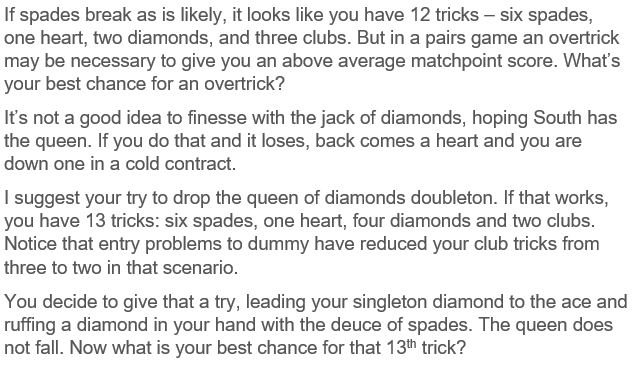
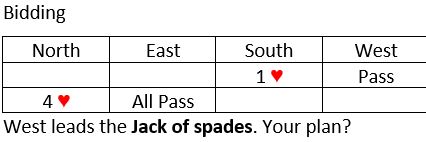
As South you opened 1NT in 3rd seat. 1NT gets passed out. Your mission is to plan the best chance for overtricks at matchpoints. Follow the play to the 1st two tricks and decide on your plan.

Trick 1: West leads the ace of clubs (A from AK), East plays the jack, and you play low.

Trick 2: West shifts to the three of diamonds, East play the nine, and you win with the ace.


Reminder: You need to employ two NT fundamentals:

What do you plan to do at trick three? Put differently, what suit is best to establish a winner now? Decide on your plan (be specific), and scroll down to see my recommendation:


I recommend you lead the nine of clubs at trick three. That has the effect of establishing two club winners while creating two club entries to dummy (the eight and queen will become winners in the dummy).

What if West refuses to win the king, leaving you with only one sure entry to dummy? In that case lead the AK of diamonds at tricks 4 and 5. Then lead the ace and jack of hearts at tricks 6 and 7. Now your entry to dummy is set up when you next lead a club.

BTW, the defense might cause you a problem at trick 7. Do you see what that might be?


Declarer Play Puzzle

Posted on by 0 comment

The contract should have been six hearts (NS have a nine-card heart fit). Be that as it may, South now has to play 6NT? Opening lead is the jack of clubs, East following with the deuce.

South wins with the queen of clubs and notes that dummy has only one sure entry to the heart suit. What is South’s best chance to make 6NT? Please give me your thoughts in the comments.


One More Puzzle from Victor Mollo*

Posted on by 0 comment

You are South in 3NT. How are you going to make the contract after East plays the jack of hearts at trick one and you win the queen?

Mollo1

*From I Challenge You by Victor Mollo

Count your sure winners: one spade, two hearts, one diamond, and one club. You need to develop five more winners to get to nine tricks. The diamond suit should set up for four or five of the additional tricks. That gets you to eight or nine tricks. By driving out the king of spades you will have at least nine tricks.

But there is a danger that the opponents will get five tricks before you can get nine! How are you going to avoid that danger and what card do you play at trick two?

This is a common dilemma for declarer, so it would benefit you to work it out before scrolling down for the solution:


It looks like West started with five hearts and East with three. The danger is that West may cash three heart tricks if she has an entry with the king of spades. And East is certain to continue the heart attack when she gets in with the king of diamonds. To prevent this, you must keep East off lead while West still has an entry with the king of spades. Play the queen of spades at trick two. No matter who wins that trick, you have a sure nine tricks when East gets in with the king of diamonds: two spades, two hearts, four diamonds, and one club. And you will make an overtrick if West has the king of diamonds. If East happens to get in with the king of spades at trick two, you can safely duck her heart return and take your ace when she continues hearts at trick four.

A Challenge from Victor Mollo

Posted on by 1 comment

Steve Bartholomew recently emailed me some declarer play puzzles from Victor Mollo’s book I Challenge You. (Thanks, Steve.)  Mollo’s challenge is to use readily available clues to guide your declarer play. Mollo says at the outset, “there’s nothing up my sleeve, no traps for the unwary, and above all, no abstruse conventions in the bidding to obscure the clarity of the play”.

Here, for example, is the first puzzle:

Mollo


West leads out the ace, king, queen of spades. You ruff the 3rd spade in hand. How are you going to play from here to make the contract?

Scroll down for the solution:


It’s a near certainty that East has the ace of clubs and King of diamonds (West did not open the bidding). Lead your singleton club and put in the 10. If it loses to the jack, there is nothing East can do to hurt you. When you get to dummy again you will take ruffing finesses against East’s ace of clubs to discard your two losing diamonds.

Did I say, “when you get to dummy again”? You did not lazily ruff that third spade with the heart seven, did you? Of course not, you saw the need to preserve the eight of hearts as an entry to dummy. The eight is equal to the ace in its trick taking power against opponents holding of deuce through six of hearts.

How Do You Handle the Trump Suit?

Posted on by 0 comment

Here is a somewhat difficult declarer problem from a recent hand I observed on BBO. You are South with the hand and bidding shown:

drawtrump

Opening lead is the eight of diamonds. How many losers do you have and how are you going to handle the trump suit?

You have one or two losers in clubs. After you take the ace and king of diamonds you may be able to ruff a diamond loser or two. After you win the ace of hearts you may be able to ruff a heart loser or two. Spades look like they can come in with no losers if you get the likely 3-2 break.

Since it looks like you are going to have to do some ruffing of red suit cards, maybe you should not get in a rush to draw trump.

Say you draw two rounds of trump. Now you can ruff two heart losers in hand. That would get you to 10 tricks as long as the ace of clubs is onside.

It looks best to ignore trumps from the get go. Cash the ace of hearts at trick two. Ruff a heart. Cash the king of diamonds. Ruff a diamond. Ruff a heart. Ruff a diamond. You are almost assured of 10 tricks.

The hand will make five spades against perfect defense. It’s a nice double dummy problem. Here is the entire hand if you would like to give it a try:

drawtrump1


Declarers who drew three round of trump went down one.

Quote of the Day

Posted on by 0 comment

When reading about suit combinations, I strongly suggest dealing out the suit in question.

That’s from Marty Bergen in Bridge Bulletin, January 2020, p, 57.

It’s often hard to see what’s really going on when looking at a hand diagram. Put those cards on the table!

Your Best Chance for an Overtrick?

Posted on by 0 comment


overtrick1

overtrick2

overtrick4

overtrick5

Declarer Play Exercise

Posted on by 0 comment

entries1

entries2


This is an exercise in figuring out what to do about the club suit. You may have two losers in hearts, so you may need to hold your club losers to one. It would be helpful if you could induce the opponents to lead clubs. By planning your entries carefully, you can make the opponents help you!

HT: Mike Lawrence in the Bridge Bulletin

Take 8 tricks!

Posted on by 0 comment

Here is a fun little mini-puzzle for you. Spades are trump and lead is in the South hand. Your mission, should you decide to accept it, is to take eight tricks against any defense. Enjoy:

mini dbl dummy


Tricks

Posted on by 0 comment

optimism

count tricks

tricks count


Declarer problem

Posted on by 0 comment

Wed bd 14 play


BTW, did you make a mental note of who has the remaining honors in hearts? And how many hearts do you think that player has? Did you use apply the rule of 11 at trick one?

Recommended line of play: You have a nine card diamond fit, so dummy’s diamonds should run if they split no worse than 4-0. You are in dummy, having won with the nine of hearts. Play a low diamond from dummy and insert the jack. Even if it loses to the queen, you know the diamond split is no worse than 3-1. And the remaining diamonds are sure to take tricks. You see how, don’t you? If not, please ask me.

When I observed the play on this hand declarer led the ace of diamonds at trick two, playing the two from his hand. It was not possible to recover after that. Bottom line: It’s right to recognize diamonds as your source of tricks, but make sure you retain an entry (the ace of diamonds in this example) to cash them.